


Shell
A shell is a command-line interface that acts as an intermediary between the user and the operating system kernel. It takes commands from the user, interprets them, and then sends them to the kernel for execution. In simple terms, a shell is like a translator that allows users to communicate with the computer's operating system using text commands.
bash: Bourne Again Shell
sh: Bourne Shell
zsh: Z Shell
fish: Friendly Interactive SHell
ksh: Korn Shell
dash: Debian Almquist Shell (POSIX-compliant)
csh: C Shell
tcsh: TENEX C Shell (an enhanced version of C Shell)
Shell Expansion
Shell expansions are mechanisms in a shell that automatically manipulate and modify commands before they are sent to the kernel for execution.
Shell Commands & Arguments
1. echo:
Basic:
echo string: Prints the specified string.echo Hello World # Output: Hello Worldecho 'string': Prints the string enclosed in single quotes. Single quotes preserve the literal value of each character within the quotes. No variable substitution or interpretation of special characters within the single quotes.echo 'Hello $USER' # Output: Hello $USERecho "string": Prints the string enclosed in double quotes. Double quotes allow variable substitution. For example, if you have a variable, it will be replaced with its value. Interpretation of certain escape sequences like\n(newline) or\t(tab) within the double quotes.USER="John" echo "Hello $USER" # Output: Hello John
Advanced:
echo -e "string \n new \t tab": Enables interpretation of backslash escapes like Newline (\n) and tab (\t).echo -e "string \n new \t tab"string
new tab
2. echo $SHELL, echo $HOSTNAME:
Basic:
echo $SHELL: Prints the path to the current shell executable.echo $HOSTNAME: Prints the hostname of the system.
Advanced:
These commands can be used for scripting and configuration where the shell or hostname information is needed.
  #!/bin/bash

  # Script to check system configuration using shell and hostname information

  current_shell="$SHELL"
  system_hostname="$HOSTNAME"

  echo "Checking System Configuration..."
  echo "--------------------------------"
  echo "Current Shell: $current_shell"
  echo "Hostname: $system_hostname"

  # Add more checks or configurations as needed

  echo "--------------------------------"
  echo "Configuration Check Completed."
3. Variables:
Basic:
var1=100: Assigns the value 100 to the variable var1.echo $var1: Prints the value of the variable var1.
Advanced:
Variables are fundamental for storing and retrieving data in shell scripting.
  #!/bin/bash
  # Basic variable assignment
  var1=100

  # Printing the value of the variable
  echo "The value of var1 is: $var1"

  # Performing some arithmetic operations
  var2=50
  sum=$((var1 + var2))
  product=$((var1 * var2))

  # Printing the results
  echo "The sum of var1 and var2 is: $sum"
  echo "The product of var1 and var2 is: $product"
4. type command:
Basic:
type command: Displays information about the type of the command.Example:
  type cd  # Output: cd is a shell builtin
  type ls  # Output: ls is /usr/bin/ls
Advanced:
Differentiates between shell built-ins and external commands.
#!/bin/bash

command_to_check="$1"

# Check if the command exists
if type "$command_to_check" &> /dev/null; then
    # Use type to get information about the command
    command_info=$(type "$command_to_check")

    # Check if the command is a shell built-in
    if [[ $command_info == *'is a shell builtin'* ]]; then
        echo "$command_to_check is a shell builtin."
    else
        echo "$command_to_check is an external command located at: $command_info"
    fi
else
    echo "$command_to_check not found."
fi
Give Execute Permission to the Script:-

./check_command.sh cd
# Output: cd is a shell builtin

./check_command.sh ls
# Output: ls is an external command located at: /usr/bin/ls

./check_command.sh nonexistentcommand
# Output: nonexistentcommand not found.
6. which command:
Basic:
which command: Shows the path of the executable for the given command.Example:
which ls # Output: /usr/bin/ls
7. Executing full path:
Basic:
/usr/bin/ls /tmp: Executes thelscommand with the full path.\
8. Environment Variables:
Basic:
Environment variables store information about the environment and are accessible by processes.
Examples:
  echo $PATH  # Output: /usr/bin:/bin:/usr/sbin:/sbin:/usr/local/bin
  echo $HOME  # Output: /home/username
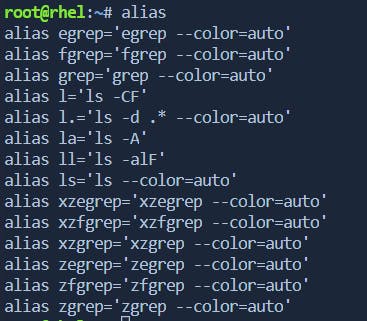
9. Alias :
1. Alias Commands and Unalias:
Basic:
alias: Creates a shortcut or alternate name for a command.unalias: Removes an alias.
Examples:
# Basic alias creation
alias ll='ls -l'

# Using the alias
ll

# Removing the alias
unalias ll
2. rm with -i Alias:
Important Points:
rm -i: Prompts for confirmation before removing each file.
Example:
# Creating an alias for rm -i
alias rm='rm -i'

# Using the aliased rm
rm file.txt
# This will prompt for confirmation before removing file.txt
10. Shell Expansion with set -x and Disable with set +x:
set -x: Enables debugging by printing commands and their arguments to the standard error output before executing. It is Mostly used to debug the scripts.set +x: Disables debugging.
Example:
# Enabling shell expansion
set -x

# Commands with debugging output
echo "Hello, world!"
# ...

# Disabling shell expansion
set +x
Control Operators
; (Semicolon):
Basic: Execute multiple commands serially.
echo "Hello"; ls -l; date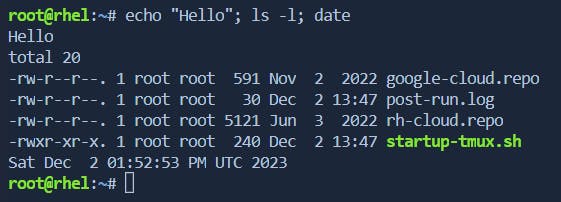
Advanced: Incorrect usage can lead to unexpected behavior.
echo "Hello"; ls -l && date; echo "World"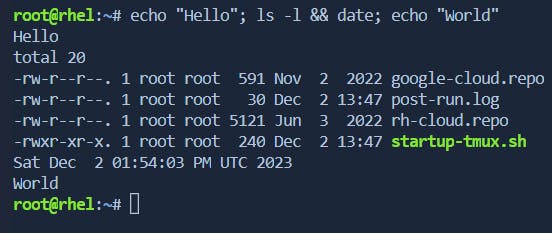
& (Ampersand):
Basic: Execute commands in parallel.
sleep 5 & echo "Background process running..."
Advanced: Can be used for running multiple background processes parallelly.
? (Question Mark):
Basic: View the exit status of the previous command.
  ls non-existent-file
  echo $?  # Output: 2 (indicating an error)
Advanced: Use in conditional checks.
[ $? -eq 0 ] && echo "Previous command succeeded" || echo "Previous command failed"
&& (Double Ampersand):
Basic: Execute the next command only if the previous one succeeds.
make && make installExample:-
sudo yum history && sudo yum update

Advanced: Chain multiple commands.
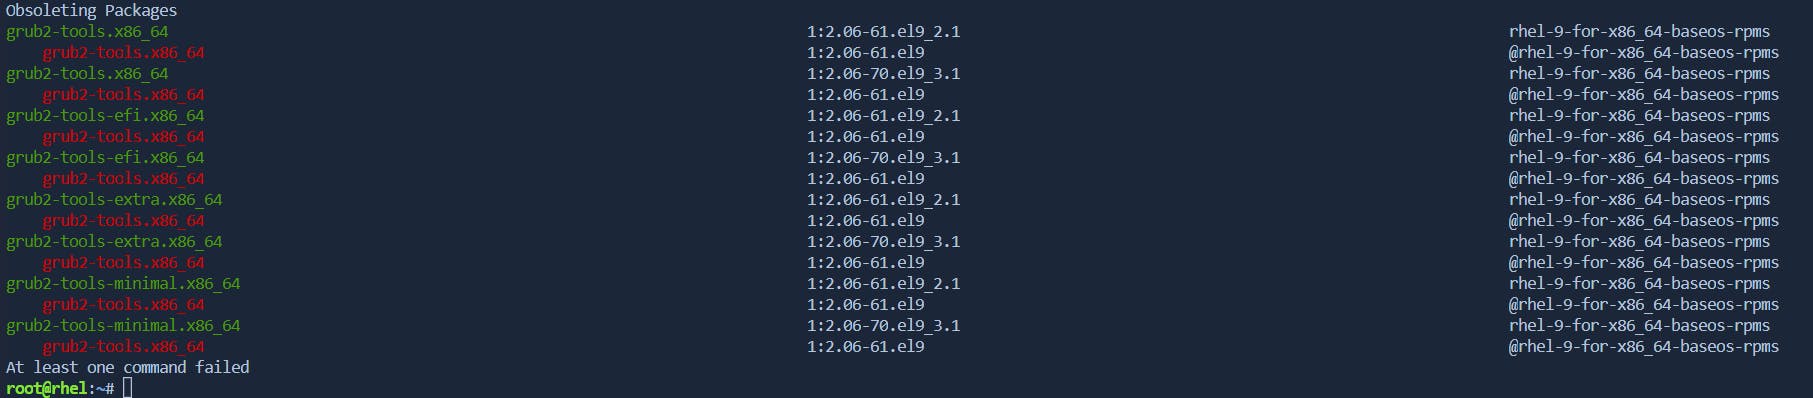
command1 && command2 && command3 || echo "At least one command failed"Example:-
sudo yum check-update && sudo yum update && sudo yum clean all || echo "At least one command failed"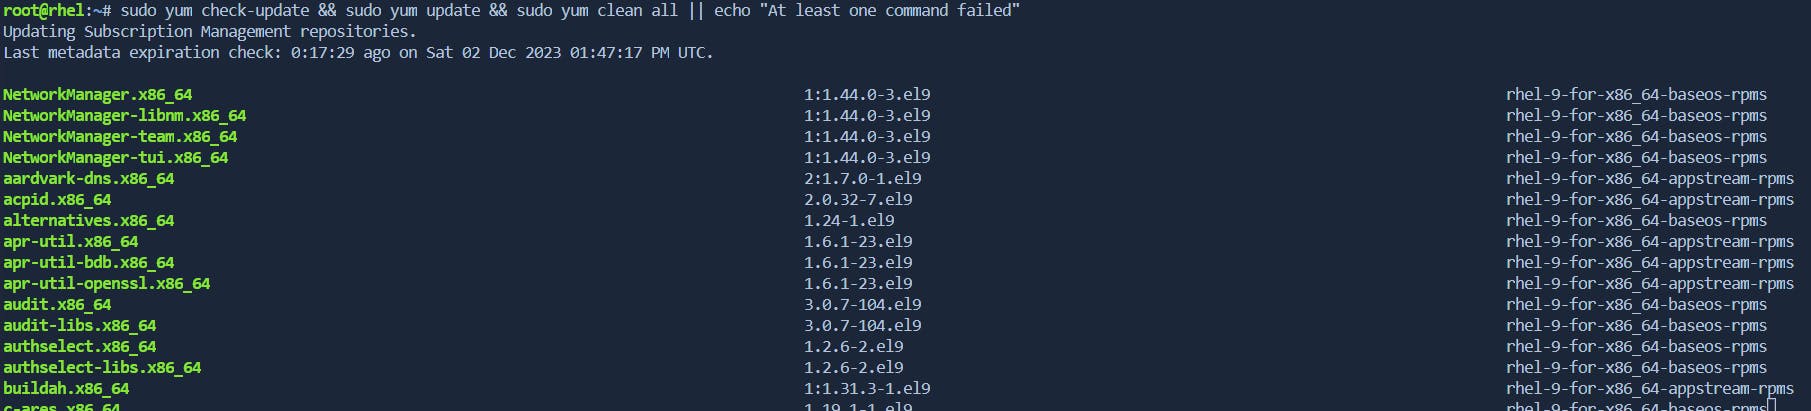
|| (Double Pipe):
Basic: Execute the next command only if the previous one fails.
rm non-existent-file || echo "File does not exist"
Advanced: Use in error handling.
command1 || { echo "Command failed"; exit 1; }
&& and || in If-Else Conditions:
check below patching script for the example
 if [ condition ]; then
     command1
 elif [ another_condition ]; then
     command2
 else
     command3
 fi
# (Hash/Pound):
Basic: Used for comments; anything after # is ignored.
echo "Hello" # This is a commentAdvanced: Useful for commenting out code temporarily.
\ (Backslash):
Basic: Escape characters; ignore the special meaning of the semicolon.
echo This is a\; test
Real-time Scenario
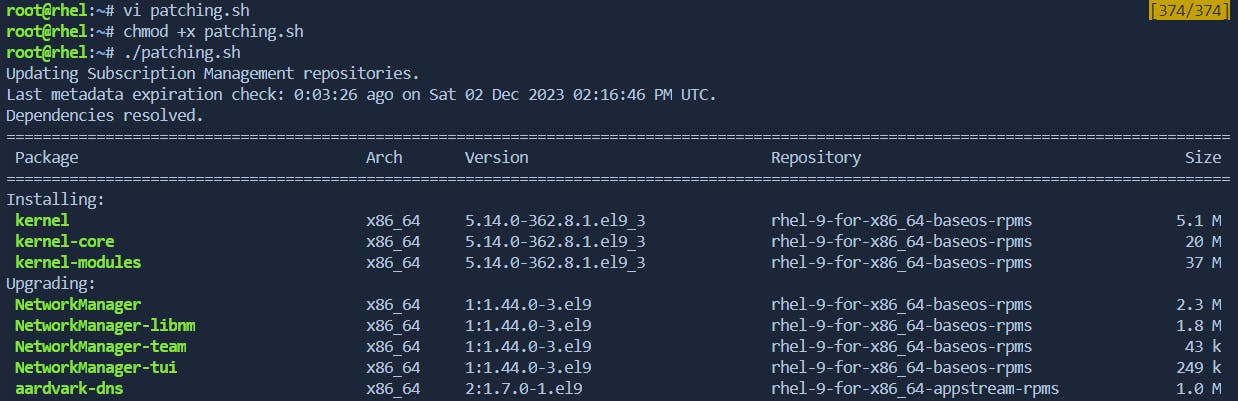
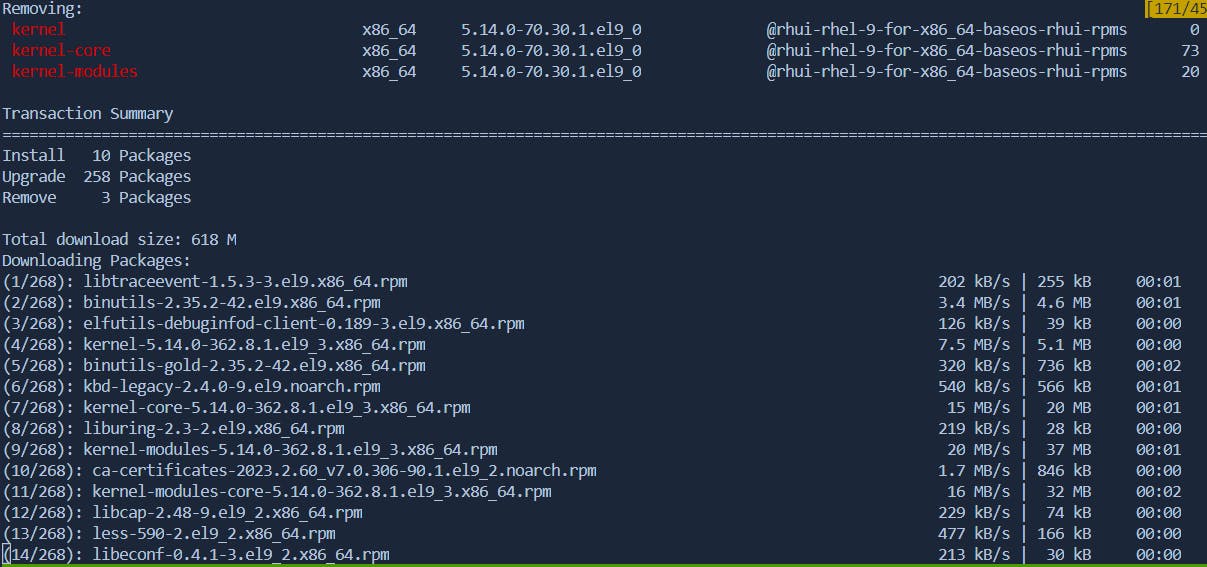
Below is the sample Patching script that is uses the above operators and error handling for a dependency issue
#!/bin/bash
# Function to display an error message and exit
display_error() {
echo "Error: $1"
exit 1
}
# Attempt to update the system
if sudo yum update -y; then
echo "System updated successfully"
else
# Get the package causing the error
error_package=$(yum update -y 2>&1 | grep "Error: .* conflicts with file from package" | awk '{print $NF}')
if [ -n "$error_package" ]; then
echo "Dependency issue with package: $error_package"
# Exclude the problematic package and try updating again
sudo yum update -y --exclude=$error_package || display_error "Failed to update system after excluding $error_package"
echo "System updated successfully after excluding $error_package"
else
display_error "Failed to update the system due to an unknown error"
fi
fi
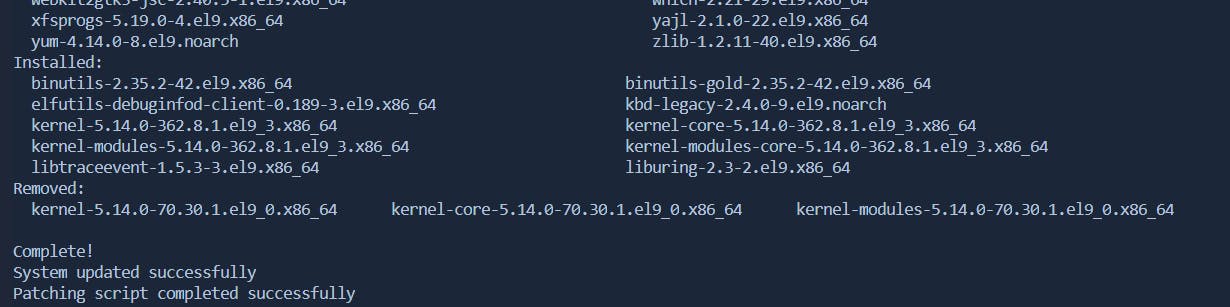
# Continue with the rest of the script
echo "Patching script completed successfully"
Debugging the Script:-
#!/bin/bash

# Function to display an error message and exit
display_error() {
  echo "Error: $1"
  exit 1
}
#!/bin/bash: This line indicates that the script should be interpreted using the Bash shell.display_error() { ... }: This defines a Bash function nameddisplay_error. The function takes one argument (the error message), prints the error message with the prefix "Error:", and then exits the script with a status of 1.
bashCopy code# Attempt to update the system
if sudo yum update -y; then
    echo "System updated successfully"
else
    # Get the package causing the error
    error_package=$(yum update -y 2>&1 | grep "Error: .* conflicts with file from package" | awk '{print $NF}')

    if [ -n "$error_package" ]; then
        echo "Dependency issue with package: $error_package"

        # Exclude the problematic package and try updating again
        sudo yum update -y --exclude=$error_package || display_error "Failed to update system after excluding $error_package"

        echo "System updated successfully after excluding $error_package"
    else
        display_error "Failed to update the system due to an unknown error"
    fi
fi

# Continue with the rest of the script
echo "Patching script completed successfully"
if sudo yum update -y; then ... else ... fi: This structure checks whether thesudo yum update -ycommand is successful. If it succeeds, it prints a success message; otherwise, it proceeds to error handling.error_package=$(yum update -y 2>&1 | grep "Error: .* conflicts with file from package" | awk '{print $NF}'): This line attempts to identify the package causing the dependency issue. It runs theyum update -ycommand, captures the error output, and usesgrepandawkto extract the name of the package causing the conflict.if [ -n "$error_package" ]; then ... else ... fi: This condition checks if a problematic package is found. If a package is found (meaning the length of the string is non-zero), it proceeds to handle the dependency issue; otherwise, it callsdisplay_errorfor an unknown error.sudo yum update -y --exclude=$error_package || display_error "Failed to update system after excluding $error_package": This line attempts to update the system again, excluding the problematic package using--exclude. If the update is successful, it prints a success message; otherwise, it callsdisplay_errorwith a custom error message.The script concludes by printing a success message indicating that the patching script was completed successfully.
In summary, the script attempts to update the system, identifies and handles dependency issues if they occur, and then prints a success message. The display_error function is used for consistent error handling throughout the script.
We can discuss Patching and Advanced Automation upcoming articles as this mainly focuses on shell expansion and we want to introduce these commands and arguments and control operator logic so we can get it where we use
Shell Variables
Shell variables are placeholders for storing data or configuration settings in the shell. They can be accessed and manipulated by the user and the system.
Types of Shell Variables:
System-Defined Variables: Automatically set by the system, e.g.,
$HOME,$USER,$PWD.User-Defined Variables: Created and modified by the user, e.g.,
my_variable="Hello".
System-Defined Variables and Modification:
To view system-defined variables:
echo $HOSTNAME,echo $PWD, etc.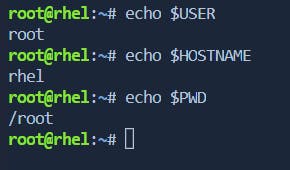
To change system-defined variables (e.g.,
$HOSTNAME) permanently, updatebashrcfile.
User-Defined Variables Creation and Usage:
Create user-defined variable:
my_variable="value".Naming rules: Case-sensitive, no numeric starting, no special characters.
Access user-defined variable:
echo $my_variable.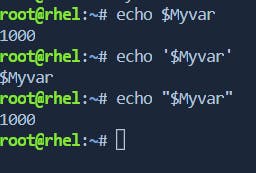
Setting and Unsetting Variables:
Set a variable:
export my_variable="value"(for making it available to subshells).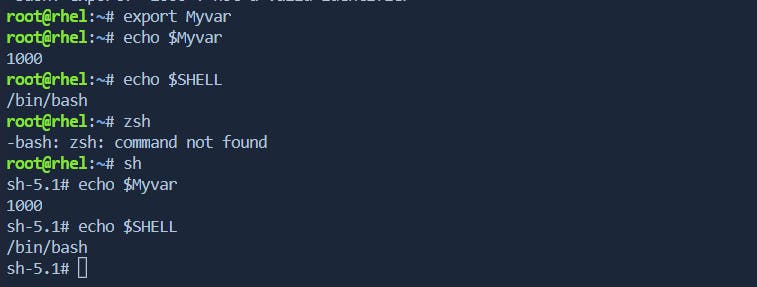
Unset a variable:
unset my_variable(to unbind a variable).
PS1 Variable and Shell Interface Customization:
PS1 Variable: Controls the shell prompt appearance.
Example of changing the prompt in
bashrcfor a normal user:PS1='\[\e[34;1m\]\u\[\e[0m\]\[\e[31m\]@\[\e[0m\]\[\e[32;1m\]\h\[\e[0m\]\[\e[37;1m\]:\[\e[0m\]\[\e[32;1m\]\w\[\e[0m\]\$ 'Breakdown of the colors and components:
\[\e[34;1m\]: Blue color for the username.\[\e[0m\]: Reset color to default.\[\e[31m\]: Red color for the '@' symbol.\[\e[32;1m\]: Green color for the hostname.\[\e[37;1m\]: White color for the colon (:) symbol.\w: Current working directory.\[\e[0m\]: Reset color to default.\[\e[32;1m\]: Green color for the path.\$: Displays the '$' symbol for a regular user or '#' for root.
6. File Matching with env LANG=C bash -c 'ls File[a-z]':
Command Explanation:
env LANG=C: Sets the environment variableLANGtoC, ensuring a consistent locale for predictable results.bash -c 'ls File[a-z]': Executes thelscommand within a new Bash shell with the specified patternFile[a-z].
Expected Output:
- Assuming you have files named
Filea,FileA,Fileb, andFileB, the output will includeFileaandFilebdue to the[a-z]pattern, which matches lowercase letters.
- Assuming you have files named

7. Shell Levels with echo $SHLVL:
Command Explanation:
echo $SHLVL: Prints the current shell level.To switch to another shell, you can use the respective shell command (
bash,ksh).
Expected Output:
echo $SHLVLbefore switching: 1 (indicating the initial shell level)After switching to
bash:echo $SHLVLmight show 2After switching to
ksh:echo $SHLVLmight show 3
8. Environment Variables with env -i bash -c 'echo $SHELL $HOME $USER':
Command Explanation:
env -i: Invokes a command with a clean environment, ignoring inherited environment variables.bash -c 'echo $SHELL $HOME $USER': Executes a Bash command to print the values of$SHELL,$HOME, and$USER.
Expected Output:
Without an environment,
$SHELLmight be/bin/bashor the path to your Bash executable.$HOMEshould be your home directory.$USERshould be your username.
9. Unbound Variable Error with set -u:
Command Explanation:
set -u: Enables the strict mode, causing an error if an unset variable is encountered.echo something_not_set: Attempts to echo the value of an unset variable.set +u: Disables the strict mode.
Expected Output:
Initially, an error like
bash: something_not_set: unbound variablewhenset -uis active.After
set +u, no error should occur, and the command will print an empty line or some default value.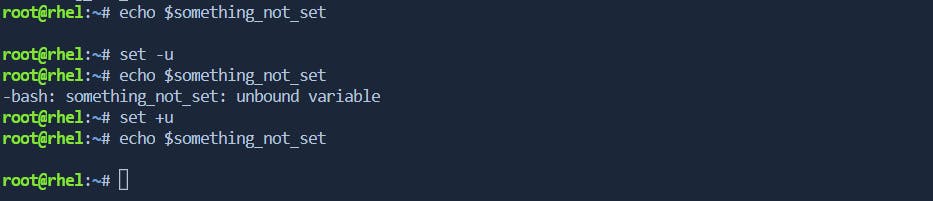
Shell Embedding
Arithmetic Evaluation with Variable Assignment in Shell
echo $[var1=5; var2=3; result=var1+var2; echo "Sum: $result"]Advanced Command Explanation:
var1=5: Assign the value 5 to the variablevar1.var2=3: Assigns the value 3 to the variablevar2.result=var1+var2: Performs variable addition and assigns the result to the variableresult.echo "Sum: $result": Prints the result of the addition.
Output:
Sum: 5+3
2. Variable Assignment and Substitution
    A="Shell"
    echo $C$B$A $(B=sub; echo $C$B$A; echo $(C=sub; echo $C$B$A))

Explanation:-
A="Shell": This line assigns the value "Shell" to the variable A.
B=sub: This line assigns the value "sub" to the variable B.
C=sub: This line assigns the value "sub" to the variable C.
echo $C$B$A: This echoes the concatenated values of variables C, B, and A. So, it outputs "subShell".
$(B=sub; echo $C$B$A): This creates a subshell by using the$(...)syntax. Inside the subshell, it sets the variable B to "sub" and echoes the concatenated values of C, B, and A. The output of this subshell is "subShell".
$(C=sub; echo $C$B$A): This is another subshell. Inside it, the variable C is set to "sub" (overriding the outer value of C), and it echoes the concatenated values of C, B, and A. The output of this subshell is "subShell" because it still uses the outer value of B.
echo $C$B$A $(B=sub; echo $C$B$A; echo $(C=sub; echo $C$B$A)): This echoes the concatenated values of C, B, and A followed by the results of the two subshells. Let's break it down:
The first part,
echo $C$B$A, outputs "subShell".The second part,
$(B=sub; echo $C$B$A), creates a subshell setting B to "sub" and echoes "subShell".The third part,
$(C=sub; echo $C$B$A), creates another subshell setting C to "sub" and echoes "subShell".
3. Backtick Usage ` `
echo `cd /etc/; ls -d pass*`
Command Explanation:
cd /etc/; ls -d pass*: Uses backticks to execute the commands inside.cd /etc/; ls -d pass*: Changes directory to/etc/and lists files starting with "pass" usingls.
Output:
Lists files in
/etc/a directory that start with "pass."
4. Variable Assignment and Echoing
    var1=5
    echo $var1
    echo $(var1=5; echo $var1)
    echo 'var1=5; echo $var1'
    echo "var1=5; echo $var1"

Command Explanation:
var1=5: Assign the value 5 to the variablevar1.echo $var1: Prints the value ofvar1.$[var1=5; echo $var1]: Performs arithmetic evaluation with variable assignment.'var1=5; echo $var1': Single quotes preserve the literal value of each character."var1=5; echo $var1": Double quotes allow variable substitution but preserve the literal value of most characters.
Shell Options
H(histexpand):History expansion allows you to recall and reuse commands from your command history.
Example:
  # Command with history expansion
  echo !1
i(interactive):Useful for scripts to determine if they are running interactively or in a non-interactive mode.
Example:
  # Check if the shell is running interactively
  [[ $- == *i* ]] && echo "Interactive shell" || echo "Non-interactive shell"
m(monitor):Example:
  # Enable job control
  set -m
Use Case: Allows for job control, such as running processes in the background and bringing them to the foreground.
B(braceexpand):Enables the use of brace expansion for generating sequences of text.
Example:
  # Brace expansion example
  echo file{1..3}.txt
s(stdin):Useful in scripts where you want to interact with the user by reading input from the standard input.
Example:
  # Read input from standard input
  echo "Enter your name: "
  read name
  echo "Hello, $name!"
u(nounset):Helps catch potential issues by causing the shell to exit if a variable is referenced before being set.
Example:
  # Enable 'nounset' to exit if an unset variable is referenced
  set -u
  # Using an unset variable
  echo $unset_variable
Shell History
Viewing History:
Command:
historyDescription: Displays the command history, showing a list of previously executed commands with line numbers.
Example:
history
Viewing Last N Commands:
Command:
history nDescription: Displays the last N commands in the history.
Example:
history 2
Executing Previous Command:
Command:
!!Description: Executes the previous command.
Example:
!!
Executing Specific Command by Number or String:
Command:
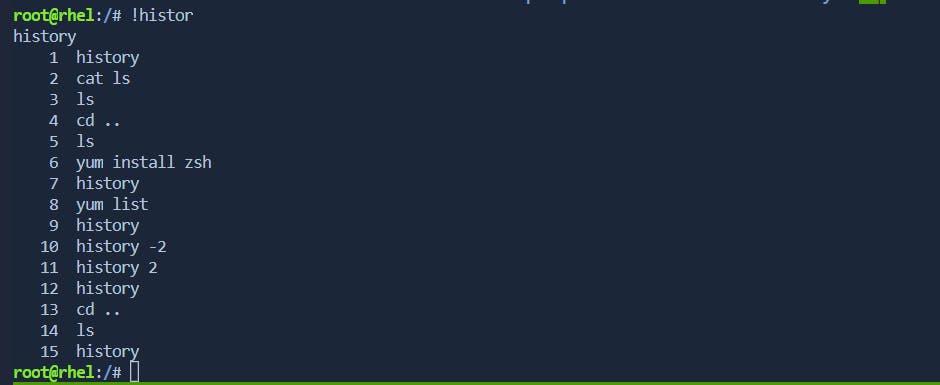
!numberor!stringDescription: Executes the command with the specified line number or the most recent command starting with the specified string.
Example:
  !123   # Executes command with line number 123
  !ls   # Executes the most recent command starting with 'ls'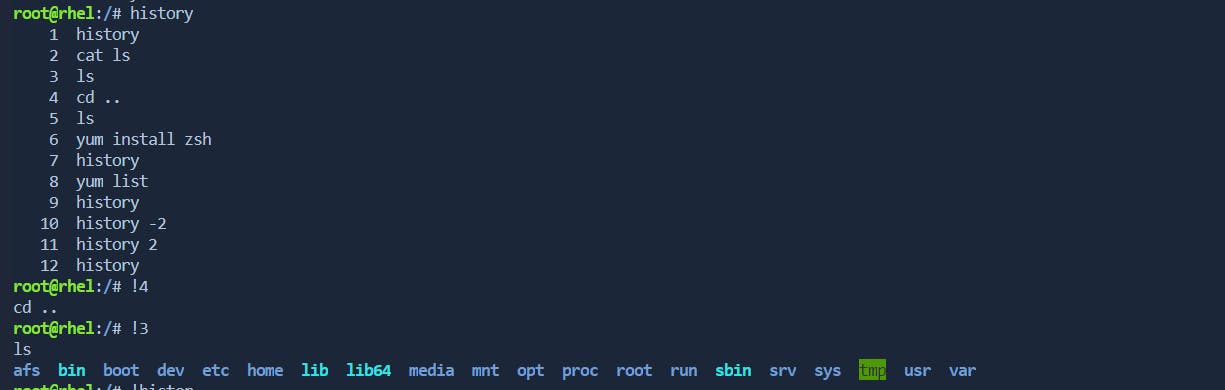
Clearing History:
Command:
history -cDescription: Clears the entire command history.
Example:
history -c
Recursive Search in History:
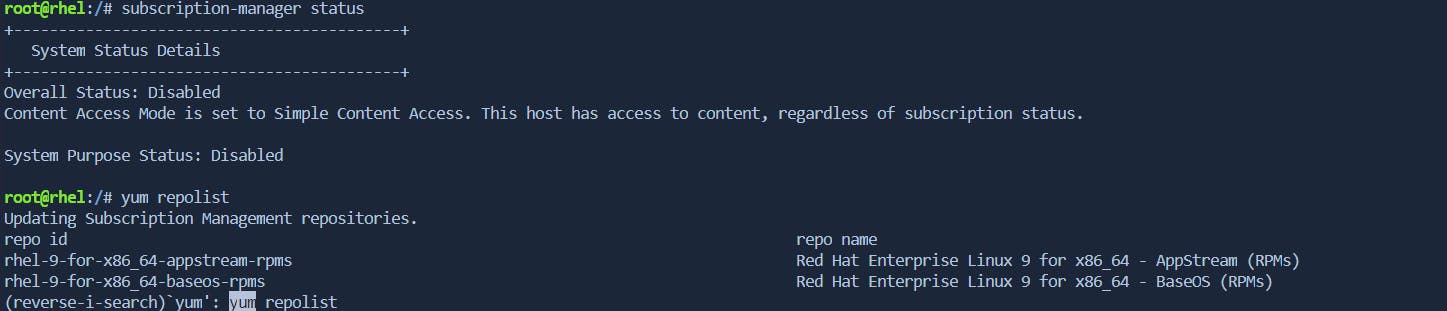
Command: Press
Ctrl + rand start typingDescription: Initiates a reverse history search. As you type, it matches the most recent command containing the entered characters.
Example:
HISTSIZE Variable:
Controls the number of commands stored in the history.
Temporary Assignment:
  # Set HISTSIZE temporarily for the current session
  HISTSIZE=1000
Permanent Assignment (Add to Bashrc): Adjusts the number of commands stored in the history for better control over the command history size. Add the following line to your
~/.bashrcfile:export HISTSIZE=1000
8. HISTTIMEFORMAT:
Sets the format of timestamps in the history.
  # Set HISTTIMEFORMAT to include date and time
  HISTTIMEFORMAT="%Y-%m-%d %H:%M:%S "
9. Last & Check Last Reboot in History:
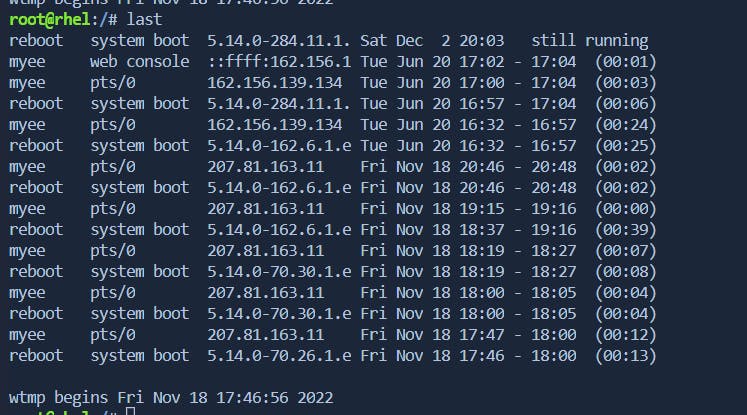
Shows the most recent command executed along with its timestamp. & also Helps identify the most recent system reboots recorded in the command history.
last
Command:
last reboot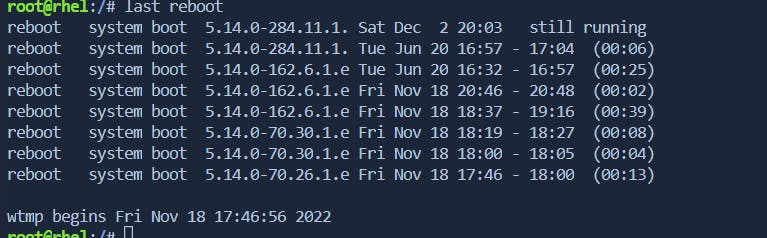
10 . Delete Specific Lines in Bash History:
Removes a specific command entry from the history by specifying its line number.
Command:
history -d <line_number>
11 . Ignore Commands from History:
Prevents commands preceded by spaces from being saved in the history.
Command:
HISTCONTROL=ignorespaceTo ignore commands starting with spaces:
  # Add to ~/.bashrc
  export HISTCONTROL=ignorespace
File Globbing
File globbing is a mechanism provided by the shell for pattern matching and expansion of filenames. It allows you to specify a pattern, and the shell expands it to match the filenames in the current directory.
Create Files:
touch file1 file2 file3 File4 File55 FileA Fileab FileAB FileabList Files Starting with "File":
 ls File*
 # Output: FileA  FileAB  Fileab  File55
List Files Containing "ile":
 ls *ile*
 # Output: file1  file2  file3  FileA  Fileab  FileAB  File55
List Files Starting with "file":
 ls file*
 # Output: file1  file2  file3  Fileab
List Files Ending with "ile55":
 ls *ile55
 # Output: File55
List Files with Single Character After "File":
 ls File?
 # Output: File4
List Files with Two Characters After "File":
 ls File??
 # No output if no matching file
List Files with "File" + Single Character + "4":
 ls File?4
 # Output: File44
List Files Matching "5" or "A" After "File":
 ls File[5A]
 # Output: File5  FileA

 # Multiple character sets
 ls File[5A][5B]
List Files NOT Starting with "num":
bashCopy codels [!num]*
# Output: FileA  Fileab  FileAB
List Files Matching Uppercase Letters After "ile":
# Assuming LANG=en_IN.UTF-8
ls [A-Z]ile?
# Output: FileA  FileAB
Change
LANGtoC:export LANG=C ls [A-Z]ile? # Output: FileA FileAB Filea FileabIgnore File Globbing:
echo *
# Output: file1 file2 file3 File4 File55 FileA Fileab FileAB
echo \* # Output: *